
Wednesday, September 30, 2009
Tuesday, September 29, 2009
Unpowered mechanical gate opener, part 2
Unpowered mechanical gate opener, part 2: "
Read more | Permalink | Comments |
Read more articles in Retro |
Digg this!"


Now here's a perfect example of why I love the MAKE community. In response to my earlier post about the possibility of modern mechanical gate openers, reader MichaelLubke went out and took these photos (1,2,3) of a real live working mechanical gate near his ranch. What's more, he ran down the original patent on the gate's design! This patent, US number 3,163,947, was issued to Mr. Alvin E. Gandy of Eden, TX, in the year of Our Lord nineteen-hundred and sixty-five. His invention, known as the 'Gandy Slide-A-Way,' is activated by the weight of one of your vehicle's tires on a short steel ramp built into the driveway right in front of the gate. I wonder how many of these were ever made?
Read more | Permalink | Comments |
Read more articles in Retro |
Digg this!"
Saturday, September 26, 2009
SGI releases personal supercomputer
SGI releases personal supercomputer: "SGI -- formerly the titanic Silicon Graphics company -- has released a 'personal supercomputer' that can handle up to 80 cores and up to a terabyte of RAM. I used to do work for an SGI VAR and we had a running joke about the merged SGI-Cray unit shipping a water-cooled laptop. This isn't that far off.
SGI Unveils Octane III Personal Supercomputer
(via The Inquirer)


 "
"
Octane III is office-ready with a pedestal, one-by-two-foot form factor, whisper-quiet operations, easy-to-use features, low maintenance requirements and support for standard office power outlets. While a typical workstation has only eight cores and moderate memory capacity, the superior design of the Octane III permits up to 80 high-performance cores and nearly 1TB of memory for unparalleled performance...
Octane III is easily configurable with single- and dual-socket node choices, and offers a wide selection of performance, storage, graphics, GP-GPU and integrated networking options. Yielding the same leading power efficiencies inherent in all SGI Eco-Logical compute designs, Octane III supports the latest Intel processors to capitalize on greater levels of performance, flexibility and scalability.

SGI Unveils Octane III Personal Supercomputer
(via The Inquirer)
Whitelines
Whitelines: "
-- Sam Putman
Related Entries:
Field Notes
Eames Design
UniBall Signo Bit 0.18mm Pens


 "
"
Anyone doing technical or design work has burned through reams of graph paper. I’m a designer, and I use Whitelines to do technical drawings in accurate scale, which are then turned into 3-D models and die tooling diagrams. Whitelines is the best graph paper I have ever worked with.
The concept is simple and powerful. Ordinary graph paper is paper with a graph of lines printed on it in a light color, often blue or gray. Whitelines is paper with a very light gray grid of squares printed on it. The graph is unprinted, hence, white lines.
This is genius. Pen strokes, and even pencil, are startlingly clear against the background. The distracting visual noise of a printed graph is gone entirely, while retaining the precision and ability to see scale, which is graph paper's reason for being.

I've been using Whitelines extensively for the past few months, mostly for technical drafting on the MakerBeam project, an open source metal building kit like Meccano for the Arduino set. The grid is .5 centimeter pitch, perfect for working on a metric standard. With ordinary graph paper, pencil lines are close in color weight to the lines themselves. When scanning pencil marks on ordinary graph paper, the pencil lines often vanish completely. With Whitelines, I can scan a pencil sketch, if I'm satisfied with it, without having to go back over it with pen.
Available in A4, A5 and pocket sizes, as tablets, spiral bound, perfect and hardbound, both lined and graph. Better graph paper makes better drawings, and this is genuinely better graph paper.
-- Sam Putman
Whitelines Perfect Bound A4 Squared Notebook
$10
Available from Amazon
Manufactured by Whitelines
Related Entries:
Field Notes
Eames Design
UniBall Signo Bit 0.18mm Pens
How to surf the web anonymously on your Android device
How to surf the web anonymously on your Android device: "


 "
"
This tutorial will guide you through the steps required to browse the web anonymously on your Android phone.
- Start out by opening up the Android Market. Select Search from the options.
- Enter the word torproxy in the search field, and run a search for it.
- You should get two results: TorProxy and Shadow. Install both of them.
- Once both TorProxy and Shadow are installed, open your applications list and select TorProxy
- Here you’ll have to set your anonymous preference. Off will leave it turned off until you change that setting, on-demand will turn TorProxy on when an application (Shadow) requires it, and always on will leave it always running. The on-demand option is a good one.
- Now launch Shadow from your applications list. One thing you’ll notice right away is that a “timer” will appear in your top menu, counting down. This is the TorProxy connection status, and it lets you know how long it’s going to take to make a connection. Once the timer hits 0, you should be connected.
- Once you’re connected, the “timer” icon will change to an onion – and Shadow will notify you that you’re now browsing anonymously.
- Shadow is similar to the built in Android browser. Click the menu button on your device, and the Shadow options will appear. Select Go to enter an address.
- I visited http://whatsmyip.net to find out what IP address web sites believed I was ‘coming from’ (the Tor Proxy).
- It also confirmed that I was browsing anonymously – the IP address displayed was not the one assigned to my Android device.
- One thing you’ll notice while surfing with Shadow is that a little Cookies Blocked button will appear fairly often. This lets you know that the page you’re visiting wanted to issue a cookie to you, but Shadow blocked it. Tap that icon..
- … and you can change the setting to allow cookies for that domain (whitelist).
- If you bring up the Notification window while TorProxy is running, it will be displayed. Tap its entry.
- From here you can change the settings, turning TorProxy off etc.


---
Related Articles at Simple Help:
- How to take screenshots of your Android based phone from OS X
- How to quickly enable or disable Wi-Fi on your Android device
- How to take screenshots of your Android based phone from Windows
- How to surf the web anonymously using OS X
- How to copy music to your Android phone from Windows
The complete step-by-step guide to rooting your Android phone
The complete step-by-step guide to rooting your Android phone: "


 "
"
This tutorial will guide you every single step of the way through the process of rooting your Android phone, and installing the Cyanogen ROM.
I’ve created this guide by using several other sources I found online. None were (in my opinion) as comprehensive and easy to follow as this one.
If you’re wondering why you’d want to root your Android phone, give Lifehackers Five great reasons to root your Android phone a read.
It should be noted right up front: following the steps in this tutorial may void the warranty on your phone. All of your settings and applications will be wiped out (but the data on your SD card will remain intact).
Note: the steps and screenshots in this tutorial are specific to the HTC G1. It’s my understanding that this process will work perfectly fine with the myTouch 3G, but I cannot personally confirm that, as I don’t have one.
Here goes:
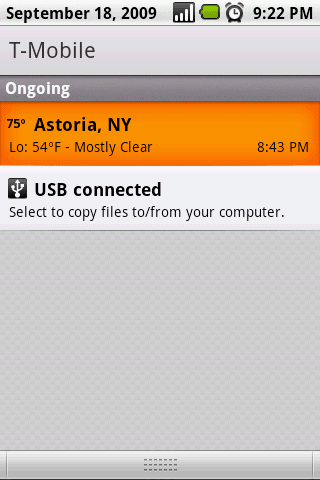
- Start out by plugging your your phone into your PC via USB. Once it’s connected to your PC, you should see a small USB icon in the upper left corner of your phone. Drag the “menu bar” down and there will be an entry titled USB connected. Tap (or click) it.
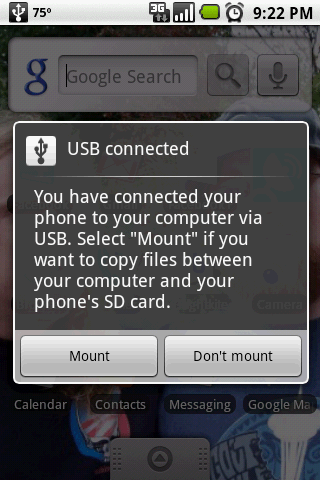
- Now tap the Mount button.
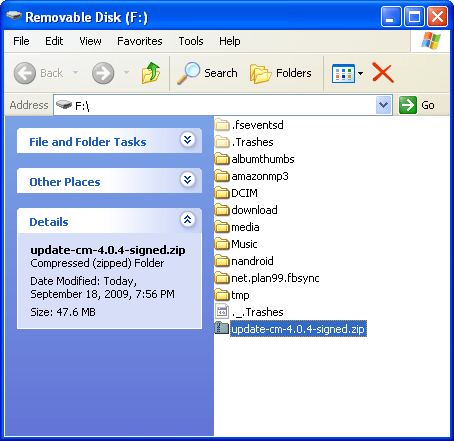
- In your browser, visit this page and download the latest stable release of CyanogenMod. The file will be in the format of update-cm-x.x.x-signed.zip (make sure to download the zip file and not the md5sum file). At the time of this tutorial, update-cm-4.0.4-signed.zip was the latest CyanogenMod. Use the date column on the right side of the page to determine which one is the latest version.
Once you’ve downloaded the file, copy it to your Android’s SD card. The SD card can be found by going to My Computer and locating the drive that represents your SD card.
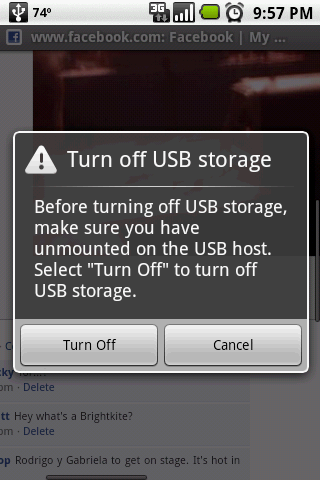
- After you’ve copied the CyanogenMod .zip file to the SD card on your phone, slide down the menu bar again and this time tap Turn off USB storage.
- You’ll be prompted with a Turn off USB storage window – tap the Turn Off button.
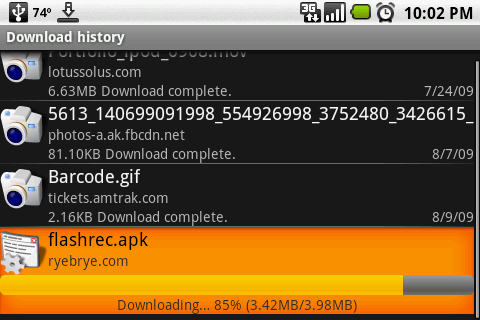
- Now open the browser on your Android phone. Enter the URL http://ryebrye.com/files/flashrec.apk.
- The file is just about 4MB in size, so it might take a minute or three to download.
- Once the download has completed, tap the download entry for that file.
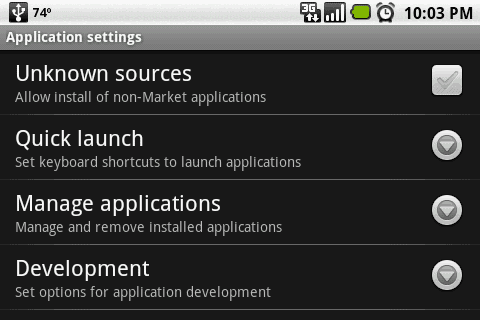
- If you haven’t previously enabled installing 3rd party applications, a warning window will pop up. Click the Settings button on that screen. Note: if you have previously enabled installing 3rd party apps, skip down to step #12.
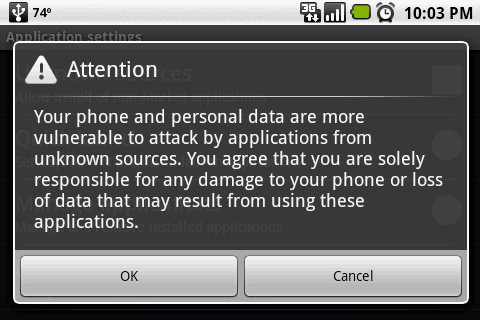
- The Application settings window will open. Tap the ‘grayed out’ check mark next to the Unknown sources entry (so that a green check-mark appears).
- Tap OK on the warning window.
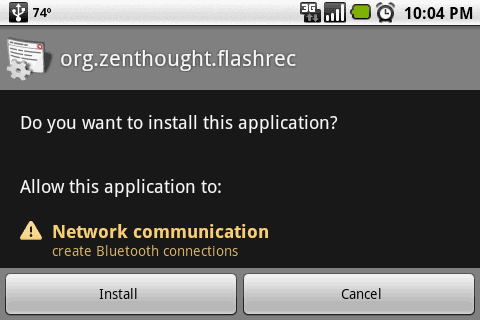
- Use the Back button to return to the downloads list. Now tap the download entry for flashrec.apk again. This time you’ll be prompted to install it. Click the Install button.
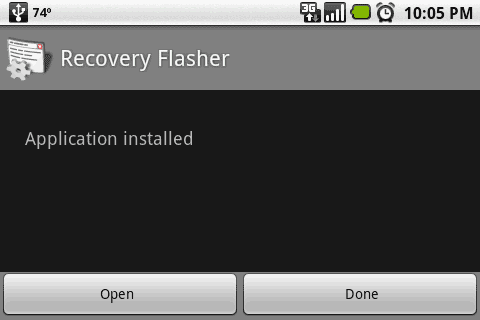
- Once the installation has completed, tap the Open button.
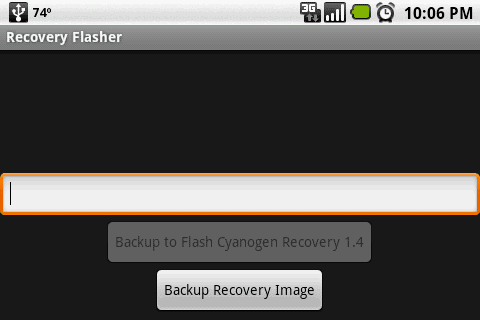
- On the Recovery Flasher window, tap the Backup Recovery Image button.
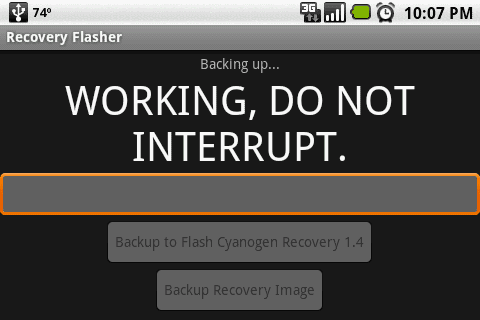
- Let the recovery flasher do its thing. It’ll only take a few moments.
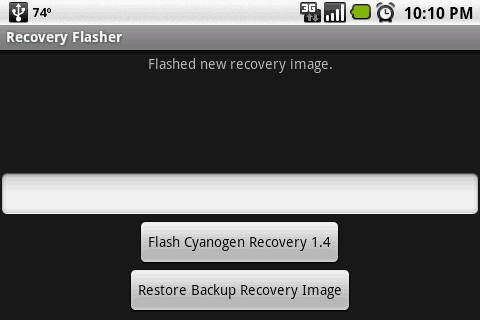
- Once the backup has completed, you should be presented with a screen that says Backed up. at the top. Now tap the Flash Cyanogen Recovery 1.4 button.
- Once this process has completed, you’ll be presented with a screen that says Flashed new recovery image. at the top.
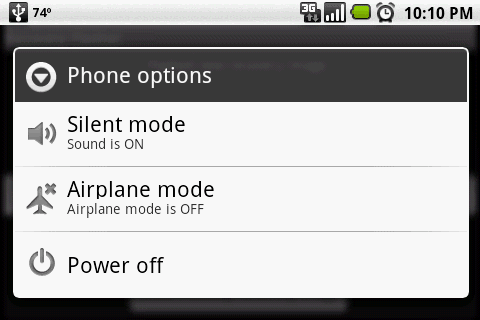
- At this point you need to power your phone off. Hold down the power button and select the Power off option.
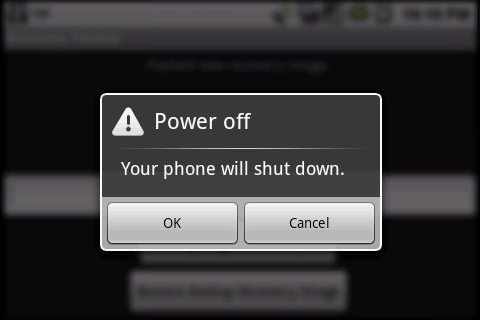
- Tap OK to shut your phone down.
- Hold down the Home button and click the power button to turn your phone back on. It’s very important that you hold down the Home button when turning your phone back on or Android will over-write the recovery image that you just installed.
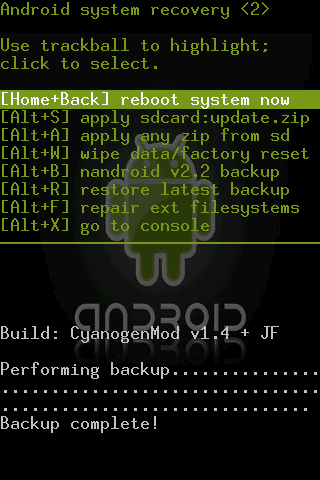
When Android powers up, you’ll be presented with a new screen – the Cyanogen recovery image. Use your trackball and navigate down to nandroid v2.2 backup. Click this entry with the trackball.
- Cyanogen will now create a recovery image for you. This is very helpful if you ever need to restore your Android phone. Don’t skip this step.
- Once the backup has completed, you’ll see a screen with Backup complete! at the bottom.
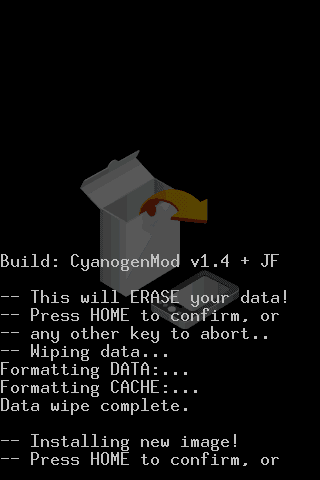
- Now scroll down to the entry titled wipe data/factory reset and click it with your trackball.
- You’ll be asked to confirm this action by clicking the HOME button on your phone. Do so now.
- Cyanogen will now wipe your Android phone. Once this process has completed, scroll to the apply any zip from sd entry and click it.
- Select the .zip file that you copied to your SD card way back in step #3. Again, this file should be titled something like update-cm-x.x.x-signed.zip. Once you’ve selected that file, click it (using the trackball-button).
- Click the HOME button to confirm this action.
- The process of applying the CyanogenMod can take a couple of minutes to complete, so don’t worry if nothing seems to be happening.
- Once it says Install from sdcard complete at the bottom of your screen, scroll to the reboot system now entry and click it.
- Your phone will now restart. You’ll notice that the boot screen is slightly different now. This is a good sign.
- Once your device finishes starting up, right away you’ll notice a new background image.
- If you’d like to confirm everything installed, open your Settings, scroll down to About phone and select it. There should be a new entry in that list titled Mod version. It should say CyanogenMod-x.x.x (where x.x.x is the version you downloaded and installed).
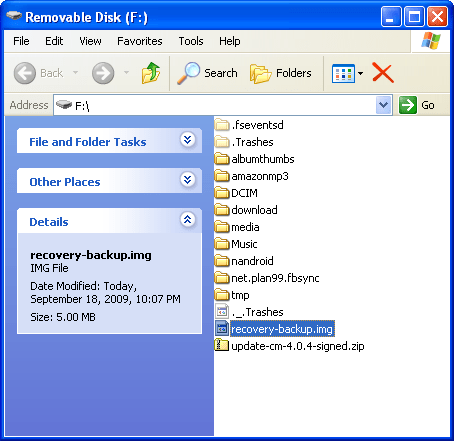
- Once again mount your SD card in Windows (see steps #1-3 above). There should be a new file on your SD card titled recovery-backup.img. Copy this file to your PC. This is the backup that you created in step #14, and it’s very important and helpful to have if you should every decide to restore your Android phone. It’s also a good idea to copy this file elsewhere – to your online backup service, a DVD, an external drive etc. You may even want to email a copy to yourself if you use an online email service like Gmail, so that it will always be stored on the Gmail servers.
- That’s it! You’ve now rooted your phone and installed the CyanogenMod mod. Explore your Applications and phone – you’ll notice a number of new apps and features. One of which is that you now have 5 ‘home’ screens instead of 3. You should also notice that your phone is considerably faster – one of the main reasons to go through this process.


---
Related Articles at Simple Help:
- How to copy music to your Android phone from Windows
- How to copy music to your Android phone from your Mac
- How to take screenshots of your Android based phone from Windows
- How to take screenshots of your Android based phone from OS X
- How to quickly enable or disable Wi-Fi on your Android device
Subscribe to:
Posts (Atom)